| Changing Installing Shock Absorbers |
Installing
New Shock Absorbers | Step 2 | Step
3 | Step 4 | Step
5 | Step 6
Step 7 | Step
8 | Step 9 | Step
10
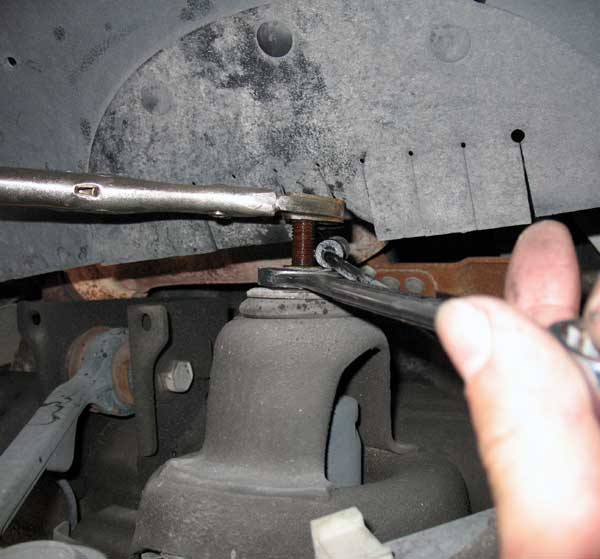
The easiest way to remove a shock is to start with the top. By doing it this way, with the shock still bolted at the bottom, you don't have to worry about holding it with one hand while you are working on it with the other. The first thing in removing the old shock is to get the top nut off. Typically on a shock absorber, when you turn the nut with a wrench, the piston shaft will also rotate. So you have to wrench off the nut, but also keep the shaft from rotating or spinning. In this instance, I have used a pair of Vice-grip pliers, clamped on the very end of the shock's shaft, to hold it while I use a wrench to get the nut off. This is a good time to use some WD40 on the threads to help the nut come off. Try not to damage the threads to much with the Vice-grips. There will be some, but as long as the nut will work itself off, you are ok. Keep using your wrench. Your goal is to work the nut up high enough so you can reset the vice-grip pliers BELOW the nut. (This is shown in our next step). |
|
(TIP:
If the old shocks are rusted on, or there is just no way to break loose
the nut, another
solution would be to take a hacksaw and cut the upper stud off below the
nut. Sometimes a mechanic
will use a torch, but I recommend against that. The rubber bushings are
very flammable, and
on most vehicles, the fuel line or rails run along the frame at this point.
THINK SAFETY!)
Installing New Shock Absorbers | Step 2 | Step 3 | Step 4 | Step 5 | Step 6 | Step 7 | Step 8 | Step 9 | Step 10