| Changing Installing Shock Absorbers |
Installing
New Shock Absorbers | Step 2 | Step
3 | Step 4 | Step
5 | Step 6
Step 7 | Step
8 | Step 9 | Step
10
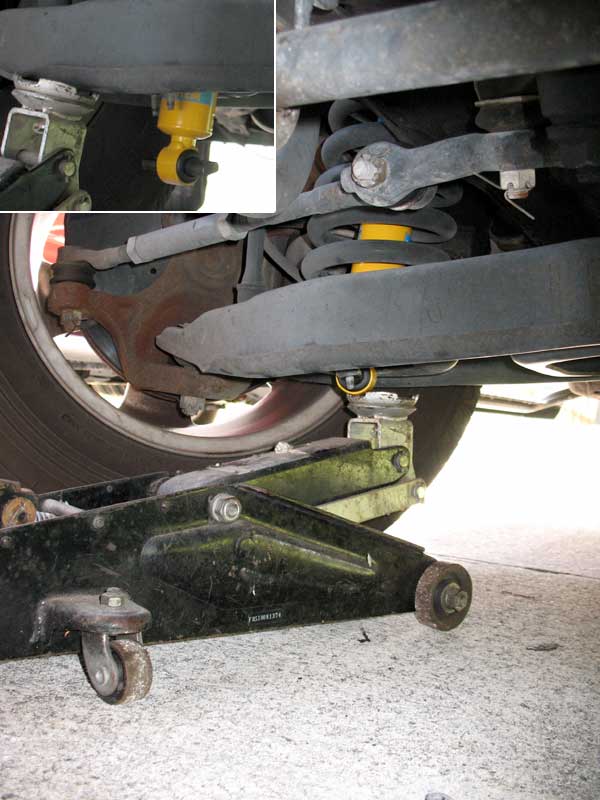
Now that the new shock is hanging temporarily, we need to finish the bottom part of this installation. In the upper left of the picture, you can see the shock hangs down a couple of inches through the bottom of the control arm. It would be nearly impossible to compress the shock up by hand so you can tighten up the nuts on the studs. And since we have a floor jack, there is no need to cause injury trying to do that. Just put the floor jack under the shock, give it a few pumps, and the jack will do the work for you. Once the shock is flush with the lower control arm mount, start threading the nut(s) on. In this case, only one nut was needed to hold the shock temporarily. Once that was done, I removed the jack (Note: Make sure the top stud is centered on the hole), installed the other lower nut, and tightened them up. The bottom is now done.
|
Installing New Shock Absorbers | Step 2 | Step 3 | Step 4 | Step 5 | Step 6 | Step 7 | Step 8 | Step 9 | Step 10